The hat theme for the November 2009 Hat! Hats! Hats! group on Ravelry.com was vintage hats. I couldn't decide what I wanted to do. Cloche? Turban? So I came up with this hat, a combination of both styles. I particularly like the accent at the face edge. It looks sort of art deco-ish to me. The hat is knit flat, seamed and the stitches for the top are picked up and knit in the round. Then the i-cord accent is added. It is pretty quick and easy to make, thanks to the bulky weight yarn. I named this hat after my friend Jodie from my knitting group, the Loopy Ladies.
I'm not sure how adept I am at writing patterns, so bear with these directions and let me know if something is wrong or confusing.
Lady Jodie Hat
Materials:
100-110 yards bulky yarn (I used a little less than 1 skein Misti Alpaca Chunky)
size 10 needles, straight and double point
yarn needle
decorative button or brooch
Gauge: 4 stitches per inch.
Side Crown:
Cast on 23 stitches (for a taller forehead, cast on 26 stitches)
Row 1: *Knit 2, purl 1*, knit 2.
Row 2: *Purl 2, knit 1*, purl 2.
Repeat rows 1 & 2 until piece measures 21 inches. (Or longer/shorter, depending on how large the wearer's head is. It should be a half inch or so smaller than the wearer's actual head measurement).
Cast off.
Seam the sides together using mattress stitch (
instructions here) or whatever stitch you prefer.
 Top Crown:
Using double point needles, pick up 16 stitches on each of 4 needles along the top edge for a total of 64 stitches. If the side crown was knit longer than 22 inches, pick up 17 stitches per needle, knit rows 1 & 2, and decrease one extra time like this: knit 7, knit 2 together. Then continue with Row 3
Row 1: Knit every stitch
Row 2 and every even row until row 16: Knit every stitch
Row 3: Knit 6, knit 2 together. Repeat. 56 stitches left
Row 5: Knit 5, knit 2 together. Repeat. 48 stitches left
Row 7: Knit 4, knit 2 together. Repeat. 40 stitches left
Row 9: Knit 3, knit 2 together. Repeat. 32 stitches left
Row 11: Knit 2, knit 2 together. Repeat. 24 stitches left
Row 13: Knit 1, knit 2 together. Repeat. 16 stitches left
Row 15: Knit 2 together. 8 stitches left
Row 16: Knit 2 together. 4 stitches left.
Cut yarn, draw tail through the stitches using a yarn needle. Fasten off on inside of hat.
I Cord and Embellishment:
At top of seam in side crown pick up 8 stitches vertically.
Row 1: Knit
Row 2: Purl

Row 3: Knit
Row 4: Purl 2 together, knit 4, purl 2 together.
Row 5: Knit
Row 6: Purl 2 together, knit 2, purl 2 together
Row 7: Knit
Begin I-cord. make I-cord for 11 inches.
Embelishment Part 1: (this is worked in stockinette until last couple rows)
Row 1: purl
Row 2: Knit front and back, knit 2, knit front and back. 6 stitches
Row 3: purl
Row 4: Knit front and back, knit 4, knit front and back. 8 stitches
Row 5: purl
Row 6: Knit front and back, knit 1, knit front and back, knit 2, knit front and back, knit 1, knit front and back. 12 stitches
Row 7: knit
Row 8: knit
Cast off.
Embellishment Part 2: (this is worked in stockinette until last couple rows)
On the back of Row 3 from the first embellishment pick up 6 stitches.
Row 1: Purl
Row 2: Knit front and back, knit 4 knit front and back. 8 stitches
Row 3: Purl
Row 4: Knit front and back, knit front and back, knit 4, knit front and back, knit front and back. 10 stitches
Row 5: Purl
Row 6: Knit front and back, knit front and back, knit 1, knit front and back, knit 3, knit front and back, knit 1, knit front and back. 15 stitches
Row 7: Purl
Row 8: Knit front and back, knit 5, knit front and back, knit 1, knit front and back, knit 5, knit front and back. 19 stitches.
Row 9: Purl
Row 10: Knit front and back, knit 7, knit front and back, knit 1, knit front and back, knit 7, knit front and back. 22 stitches.
Row 11: Knit
Row 12: Knit
Cast off.
Finishing the Hat:
Weave in ends.
Lay the I-Cord so it slants diagonally accross the hat from the top front to the opposite bottom of hat. Tack the embellishment down so it hangs a little over the bottom edge of the hat. Also tack down the I-Cord in a few places. Add a button or brooch.
 occurred, resulting in Lord Marcus being rushed to the hospital with a dislocated knee. It must have been unbelievably painful, but he returned in a few hours on crutches and showed such high spirits and chivalry that the Princess named both he and Dona Margolit (his opponent during the final bout) as co-holders of the sleeve. She carefully cut it down the middle and gave half to each.
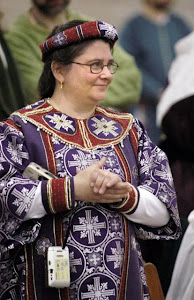
 Castel Rouge. She is generous to a fault, always making garb and giving gifts to her friends. So about a dozen of us got together and planned to make her some garb she has always wanted: an Elizabethan loose gown over a kirtle with all the appropriate jewelry, foot wear and head gear. She cried. We were all very pleased with ourselves for that. *smirk*